Showing posts with label Access. Show all posts

Friday, 15 February 2013

SQL–Overloading !

I came across this recently while considering the best way to create a function to deal with a SQL statement that could accept a varying number of parameters.

SELECT * FROM YourTable WHERE TableId = 2 AND Param1 = '%' AND Param2 = '%';

It means you don't need to use an overload function. Just swap out blank parameters for wildcard characters, meaning you don't need to do anything with the query as well. You could quite easily do this with any database engine, from Access to SQL Server.

Saturday, 31 March 2012

Find and replace VBA code using VBA

It is sometimes necessary to update your code, a quick find and replace (Ctrl+H) will often be enough.  I’d also recommend the MZ Tools VBE toolbar, it has a lot to add to your VBA coding experience, including a very good search tool.

Sometimes the above is not quite want you want.  So below is a simple bit of code you can use to replace one line of code for another.

Public Sub FindAndReplace()
'-----------------------------------------------------------------------------' Procedure : FindAndReplace
' Purpose   : Searches the active workbook for a specific code line and
'             replaces it with a new code line
'-----------------------------------------------------------------------------
    Dim SL As Long, EL As Long, SC As Long, EC As Long
    Dim S As String
    Dim Found As Boolean
    Dim sFind As String
    Dim sReplace As String

    sFind = "my old line of code"
    sReplace = "my new line of code"

    With ActiveWorkbook.VBProject.VBComponents("MyCodeModule").CodeModule
        SL = 1
        SC = 1
        EL = 99999
        EC = 999
        Found = .Find(sFind, SL, SC, EL, EC, True, False, False)
        If Found = True Then
            S = .Lines(SL, 1)
            S = Replace(S, sFind, sReplace)
            .ReplaceLine SL, S
        End If
    End With

End Sub

SL / SC is the start line / start column and EL / EC is the end line / end column.  These can be changed to target code lines within a specific part of your code.

I hope the above proves useful.  As always, any questions let us know via the comments.

Wednesday, 31 August 2011

Creating and reading data from text files

It is sometimes useful to keep data in a text file.  For example one of our clients has a resource file which has onOpen and onClose routines that log the current user, the date and time and whether the file was opened read/write or read only.

The code below shows how this can be done.

Sub Create_A_File()
' Put data into a text file
' This routine will create the file if it does not already exist

    Dim strMsg  As String
    Dim strFile As String

    strFile = ThisWorkbook.Path & "myFile.txt"
    ' could be .doc, .txt, .log etc

    strMsg = "Some text could go here"

    ' Open file for output - clears any current data
    'Open strFile For Output As #1
    ' or Open file for append - updates any current data
    Open strFile For Append As #1

    Print #1,                       ' Print blank line to file.
    Print #1, "*****"               ' Print ***** line to file.
    Print #1, strMsg                ' Print a variables value to the text file
    Print #1, Now, strMsg           ' Print date/time and the message, using commas create tab seperated data
    Print #1,                       ' Print another blank line to file.
    Print #1, Application.UserName  ' Print the current user's Excel username
    Print #1, Now                   ' Print the date and time

    Close #1                        ' Close file.

End Sub

Sub GetFromTxt()
' Copy data from one text file to another

    Dim FilePath    As String
    Dim File1       As String
    Dim File2       As String
    Dim File3       As String
    Dim FileData    As String

    Const FileExt   As String = ".txt"

    FilePath = "C:\File\Path\"
    File1 = "File Name 1"
    File2 = "File Name 2"
    File3 = "File Name 3"

    ' Example: FilePath & File1 & FileExt = "C:\File\Path\File Name 1.txt"

    'Open all relevant files
    Open FilePath & File1 & FileExt For Output As #1
    Open FilePath & File2 & FileExt For Input As #2
    Open FilePath & File3 & FileExt For Input As #3

    'Copy each line of the first existing file into the
    'new combined file
    Do While Not EOF(2)
        Input #2, FileData
        Print #1, FileData
    Loop

    'Copy each line of the second existing file into the
    'new combined file
    Do While Not EOF(3)
        Input #3, FileData
        Print #1, FileData
    Loop

    'Close all files
    Close #1
    Close #2
    Close #3
End Sub

Hope that proves useful.

Friday, 26 August 2011

Useful VBA file functions - Microsoft Scripting Runtime

Some example functions for finding out the last modified date of a file, copying a file and deleting a file using VBA.

Public Sub File_Last_Modified_Date()
' Use a function to return the last modified date of a file
    MsgBox f_File_Last_Modified_Date("C:\Put\the\full\file\address\here.xlsx")
End Sub

Private Function f_File_Last_Modified_Date(FileName As String) As String
' In the VBE, set a reference to Microsoft Scripting runtime
' Tools -> References... ->
    Dim fso As Scripting.FileSystemObject
    Dim fsof As Scripting.File
    Dim strPath As String

    Set fso = New FileSystemObject
    strPath = FileName
    Set fsof = fso.GetFile(strPath)
    With fsof
        f_File_Last_Modified_Date = .DateLastModified
    End With

    Set fso = Nothing
    Set fsof = Nothing
End Function


Public Sub CopyFile()
' Copy a file, the file cannot be open when the copy is attempted

    Dim SourceFile As String
    Dim DestFile As String

    SourceFile = "C:\Put\the\full\file\address\here.doc"
    DestFile = "C:\Put\the\new\file\address\here.doc"

    FileCopy SourceFile, DestFile
End Sub

Public Sub DeleteFile()
' Delete a file

    Dim FileName As String

    FileName = "C:\Put\the\full\file\address\here.txt"

    ' Check the file exists
    If Dir(FileName) = "" Then
        ' File does not exist
    Else
        ' Delete the file
        Kill FileName
    End If

End Sub

As always, any questions or comments please let us know via the comments section.

Tuesday, 5 April 2011

VBA Array Within An Array

When using VBA, writing anything but the most trivial VBA routines, it is likely that you’ll be using arrays somewhere in your code. This post describes how you can load one array to another and then pull the data out into a worksheet.
It is assumed that you know the basics of VBA arrays.
Sub ArrayWithinAnArray() 
'----------------------------------------------------------------------------
' Procedure : ArrayWithinAnArray
' Author    : Matthew - Zypher.co.uk
' Date      : 27/03/2011
' Purpose   : Load an ID, a data value and an array to an array
'             Then loop through the 1st array loading it’s values to the
'             active worksheet
'----------------------------------------------------------------------------
'
    Dim i As Integer
    Dim l As Integer
    Dim x As Integer
    Dim y As Integer

    Dim array1(2, 2) As Variant
    Dim array2(1, 1) As Variant

    On Error GoTo ArrayWithinAnArray_Error

    ' Add values into the 1st array
    For i = 0 To 2
        array1(i, 0) = "ID " & i
        array1(i, 1) = "Some Data"

        ' Load values to the 2nd array
        array2(0, 0) = "row1 col1"
        array2(0, 1) = "row1 col2"
        array2(1, 0) = "row2 col1"
        array2(1, 1) = "row2 col2"

        ' Load the 2nd array into the 1st array
        array1(i, 2) = array2
    Next i

    ' Set l as the first row
    l = Cells.SpecialCells(xlCellTypeLastCell).Row + 1

    ' Loop through the first array
    For i = 0 To UBound(array1)
        Cells(l, 1).Value = array1(i, 0)
        Cells(l, 2).Value = array1(i, 1)

        ' Check the 3rd value is an array
        If IsArray(array1(i, 2)) Then

            ' Loop down through the 2nd array
            For x = 0 To UBound(array1(i, 2))

                ' Loop across the 2nd array
                For y = 0 To UBound(array1(i, 2), 2)

                    ' Load the values in the 2nd array to the worksheet
                    Cells(l, y + 3).Value = array1(i, 2)(x, y)

                Next y

                ' Get the current bottom row, then add 1
                l = Cells.SpecialCells(xlCellTypeLastCell).Row + 1
            Next x

        End If

        ' Get the current bottom row, then add 1
        l = Cells.SpecialCells(xlCellTypeLastCell).Row + 1

    Next i

    On Error GoTo 0
    Exit Sub

ArrayWithinAnArray_Error:
    ' Add some error handling code here
End Sub

As always, if you have any questions do let us know via the comments section.

Wednesday, 23 March 2011

Using VBA to Truncate Decimal Values

Recently I have needed to truncate a decimal value to a set number of decimal places. 

For example; If you wanted the number 55.446 to two decimal places rounding the number would return 55.45.  Truncating the number to two decimal places returns 55.44. 

To do this I created the function below.  Pass in a decimal value and the number of decimal places you want the number truncated too and the function returns the value as a ‘Double’.

Public Function TruncTo(dblValue As Double, lngPlaces As Long) As Double
'-------------------------------------------------------------------------
' Procedure : TruncTo
' Author    : Matthew Sims
' Date      : 08-Oct-2010
' Purpose   : Truncate a decimal value to the requested number of decimal places
'-------------------------------------------------------------------------
'
    On Error GoTo TruncTo_Error

    If IsNumeric(dblValue) Then
        TruncTo = Int(dblValue * 10 ^ lngPlaces) / 10 ^ lngPlaces
    Else
        TruncTo = 0
    End If

    On Error GoTo 0
    Exit Function

TruncTo_Error:
    ' Add some error handling code here
End Function

Thursday, 3 March 2011

VBA Adjusting Speaker Volume (and Mute)

Following on from the code here (Using VBA Speech) the code below is used to make adjust the speaker volume, including turning mute on / off.

Private Declare Sub keybd_event Lib "user32" ( _
   ByVal bVk As Byte, ByVal bScan As Byte, _
   ByVal dwFlags As Long, ByVal dwExtraInfo As Long)

Sub VolUp()
'-- Turn volumn up --
   keybd_event VK_VOLUME_UP, 0, 1, 0
   keybd_event VK_VOLUME_UP, 0, 3, 0
End Sub

Sub VolDown()
'-- Turn volumn down --
   keybd_event VK_VOLUME_DOWN, 0, 1, 0
   keybd_event VK_VOLUME_DOWN, 0, 3, 0
End Sub

Sub VolToggle()
'-- Toggle mute on / off --
   keybd_event VK_VOLUME_MUTE, 0, 1, 0
End Sub

Again, this requires the PC to a sound card and speakers.

Tuesday, 1 March 2011

Using VBA Speech

With April Fools day approaching (well, four weeks) I though I’d post a couple of amusing VBA tricks and jokes you could use.  The first is using the speech and the CD trey.  The code below can be copied straight into a VBA code module.

Declare Sub mciSendStringA Lib "winmm.dll" (ByVal lpstrCommand As String, _
ByVal lpstrReturnString As Any, ByVal uReturnLength As Long, _
ByVal hwndCallback As Long)

Private Sub Workbook_Open()
    UseSpeech "The Mouse is hungry."
    OpenCDTray
    UseSpeech "Please add cheese."
    CloseCDTray
End Sub

Private Sub OpenCDTray()
    mciSendStringA "Set CDAudio Door Open", 0&, 0, 0
End Sub

Private Sub UseSpeech(stringToSpeak As String)
    Range("A1").Value = stringToSpeak
    Range("A1").Speak
    Application.CommandBars("Text To Speech").Visible = False
End Sub

Private Sub CloseCDTray()
    mciSendStringA "Set CDAudio Door Closed", 0&, 0, 0
End Sub

This does require the PC to have speakers.

Wednesday, 12 January 2011

Special Folders using the FileSystemObject

There are several methods to get find out the file paths for Microsoft Windows’ special folders (Systems folder, Temporary folder etc).  The example below uses the FileSystemObject.

Sub Special_Folders()
'-----------------------------------------------------------------
' Procedure : Special_Folders
' Purpose   : Retrieve file path for MS Windows 'special folders'
'             Requires a reference to Microsoft Scripting Runtime
'-----------------------------------------------------------------
'
    On Error GoTo ErrTrap

    Dim oFS As FileSystemObject

    Set oFS = New FileSystemObject

    ' Windows Folder Path
    MsgBox FS.GetSpecialFolder(WindowsFolder)

    ' System Folder - (example - Windows\System32)
    MsgBox oFS.GetSpecialFolder(SystemFolder)

    ' Temporary Folder Path
    MsgBox oFS.GetSpecialFolder(TemporaryFolder)

    If Not oFS Is Nothing Then Set oFS = Nothing

ErrTrap:
    Select Case Err.Number
        Case Is = 0
            ' No error continue
        Case Else
            MsgBox Err.Number & " - " & Err.Description
            Err.Clear
    End Select
End Sub

This routine requires a reference Microsoft Scripting Runtime.

Wednesday, 22 December 2010

Outlook Email using VBA (Updated)

This is an update to the code supplied here.  The previous article enabled you to send an email though Outlook using early binding.  The code below uses late binding, this means you do not need to worry about Outlook versions.
As before it includes the subject and message body fields as well as the To, Cc and Bcc fields within a standard email format. 
The code could easily be changed to loop through arrays or collections of values for many of these fields.
Private Sub SendOutlookEmail()
'-- Creates and sends a new e-mail message with Outlook --

    ' These are members of the referenced object model which _
      are unavailable due to late binding.  They have been _
      replaced with the numbers they represent

    Const olMailItem    As Integer = 0
    Const olTo          As Integer = 1
    Const olCc          As Integer = 2

    Dim oOutlook        As Object 'Outlook Application
    Dim oMailMsg        As Object 'Outlook MailItem
    Dim oRecipient      As Object 'Outlook Recipient
    Dim oRecipType      As Object 'Outlook Recipient Type

    On Error GoTo ErrTrap

    ' Create the Outlook session
    Set oOutlook = CreateObject("Outlook.Application")

    ' Create the message
    Set oMailMsg = oOutlook.CreateItem(olMailItem)

    With oMailMsg
        ' Request a receipt ?
        .ReadReceiptRequested = False
        ' Keep copy in 'Sent Items' ?
        .DeleteAfterSubmit = False
        ' Your email address or 'team mailbox' address
        .SentOnBehalfOfName = "YourEmail@Address.com"
        ' Message subject
        .Subject = "Subject Here"
        ' Add message body
        .Body = "Email Message Here"

         'Add 'To' recipient(s)
        Set oRecipient = .Recipients.Add _
            ("SomeoneElses@EmailAddress.com; AnotherPerson@Email.com")
        oRecipient.Type = olTo
         'Add another 'To' recipient
        Set oRecipient = .Recipients.Add _
            ("SomeoneElses@EmailAddress.com")
        oRecipient.Type = olTo
        ' Add 'Cc' recipient(s)
        Set oRecipient = .Recipients.Add _
            ("SomeoneElses@EmailAddress.com")
        oRecipient.Type = olCc

        ' Loop through an array to attach files
        For l = 0 To UBound(varFile)
            If Not IsEmpty(varFile(l)) Then
                .Attachments.Add varFile(l)
            End If
        Next l

        ' Display to user or Send email
        '.Send
        .Display

    End With

ErrTrap:
    Set oOutlook = Nothing
    Set oMailMsg = Nothing
    Set oRecipient = Nothing
    Set oRecipType = Nothing

    Select Case Err.Number
        Case Is = 0
            ' All okay, continue
        Case Is = -284147707
            MsgBox "You have exceeded the storage limit on your mailbox. " _
                & "Delete some mail from your mailbox or contact your " _
                & "system administrator to adjust your storage limit." _
                 , vbInformation, "Error Message"
        Case Else
            MsgBox "An error has occured:" & vbCrLf & vbCrLf _
                & Err.Number & " - " & Err.Description, "OutlookEmailFunction"
    End Select
End Sub

As always, if you have any questions do let us know via the comments section.

Saturday, 18 December 2010

Lotus Notes Email using VBA

The code I’m sharing with you today will enable you to send an email using VBA through  Lotus Notes.  It uses late binding so you do not need to use references to Lotus Notes, which in turn means you do not need to worry about your users Lotus Notes version.  I say this, though in practise this may not always be the case.  Lotus Notes is often rather frustrating, as many users will testify :)

As well as the subject and message body the routine allows you to specify the To, Cc and Bcc fields within a standard email format. 

The example below shows the code to attach a single file. This could easily be amended to loop through an array or collection of file addresses.

Sub SendAnEmailViaLotusNotes()

    Dim WS As Object
    Dim Session As Object
    Dim DB As Object
    Dim uiDB As Object
    Dim NotesAttach As Object
    Dim NotesDoc As Object
    Dim RichTextBody As Object
    Dim RichTextAttachment As Object
    Dim StyleBold As Object
    Dim StyleNorm As Object
    Dim StyleUnderline As Object
    Dim StyleFont10 As Object
    Dim Server As String
    Dim MailFile As String
    Dim TheUser As String
    Dim UserSig As String

    Dim strEmailTo As String        ' email To field
    Dim strEmailCc As String        ' email Cc field
    Dim strEmailBcc As String       ' email Bcc field
    Dim strEmailSbj As String       ' email Subject
    Dim strEmailBdy As String       ' email Body (message text)
    Dim strEmailAtt As String       ' email attachment

    Application.DisplayAlerts = False   ' turn off Excel alerts

    On Error GoTo ErrorMsg              ' on error goto ErrorMsg section...

' --- Set-up connection to Lotus Notes and Create Email object
    Set WS = CreateObject("Notes.NotesUIWorkspace")
    Set Session = CreateObject("Notes.NotesSession")

    TheUser = Session.UserName
    UserSig = Session.CommonUserName
    Server = Session.GetEnvironmentString("MailServer", True)
    MailFile = Session.GetEnvironmentString("MailFile", True)

    Set DB = Session.GetDatabase(Server, MailFile)
    Set uiDB = WS.CURRENTDATABASE
    Set NotesDoc = DB.CreateDocument

    Set RichTextBody = NotesDoc.CreateRichTextItem("Body")

' --- Set-up dist list, message and attachments
    strEmailTo = ""
    strEmailCc = ""
    strEmailBcc = ""
    strEmailSbj = ""
    strEmailBdy = ""
    strEmailAtt = ""

    NotesDoc.SendTo = strEmailTo        ' To...
    NotesDoc.CopyTo = strEmailCc        ' Cc...
    NotesDoc.BlindCopyTo = strEmailBcc  ' Bcc...
    NotesDoc.Subject = strEmailSbj      ' The subject
    NotesDoc.Body = strEmailBdy         ' Any text to be in the email

    ' Attach a file
    If strEmailAtt <> "" Then
        Set RichTextAttachment = NotesDoc.CreateRichTextItem("Attachment")
        Set NotesAttach = RichTextAttachment.EmbedObject(1454, "", strEmailAtt)
    End If

' --- Send the email / save the message in 'Sent' items
    ' False would not save the sent email to the sent items folder
    NotesDoc.SAVEMESSAGEONSEND = True
    ' Not sure why, but false send the eamil ?
    NotesDoc.SEND False

' --- Close connection to free memory
    Set Session = Nothing
    Set DB = Nothing
    Set NotesAttach = Nothing
    Set NotesDoc = Nothing
    Set WS = Nothing

    ' Turn on Excel alerts
    Application.DisplayAlerts = True

    Exit Sub

' --- if an error occurs display a message... then exit the macro
ErrorMsg:
    If Err.Number = 7225 Then
        MsgBox "The file " & strEmailAtt & " cannot be found in the specified location", vbOKOnly, "Error"
    Else
        MsgBox Err.Number & Err.Description
    End If

    Application.DisplayAlerts = True

End Sub

As always, if you have any questions do let us know via the comments section.

Access, Email, Excel, Lotus Notes, VBA

Monday, 27 September 2010

Using VBA to get a File’s Last Modified Date

It is sometimes useful to know the date and time a file was last modified.  this is particularly useful if you have a folder full of similar files and need to use the latest copy.

Today the code I’m going to share below enables you to pass a file address into a function which will return the date and time it was last saved.  The example below passes a file address to the function, which returns the modified date, this is then displayed in a message box.

The function requires a reference to Microsoft Scripting Runtime within the VBE.

Sub MyMacroRoutine()
    Dim ModDate As Date
    ModDate = FileLastModDate("C:\YourFileAddressGoesHere")
    MsgBox ModDate
End Sub

Function FileLastModDate(strFileAddress As String) As Date
' In the VBE, set a reference to Microsoft Scripting runtime

    Dim fso As Scripting.FileSystemObject
    Dim fsof As Scripting.File
    Dim strPath As String

    Set fso = New FileSystemObject
    strPath = strFileAddress
    Set fsof = fso.GetFile(strPath)
    With fsof
        FileLastModDate = .DateLastModified
    End With

    Set fso = Nothing
    Set fsof = Nothing

End Function

As always, if you have any questions do let us know via the comments section.

Wednesday, 22 September 2010

Outlook Email using VBA

The code I’m sharing with you today will enable you to send an email using VBA through  Outlook.  It uses early binding so you will need to use a reference to Outlook.  You may need to look into what version(s) Outlook will be available to your users. 

As well as the subject and message body the routine allows you to specify the To, Cc and Bcc fields within a standard email format. 

The example below shows the code to attach four files using four different formats: Insert the file, insert a shortcut to the file, Embed and OLE.

The code could easily be changed to loop through arrays or collections of values for many of these fields.

Sub SendAnEmailWithOutlook()
'-- Requires a reference to the Microsoft Outlook 8.0 Object Library or higher --

    ' Creates and sends a new e-mail message with Outlook
    Dim OLF As Outlook.MAPIFolder, olMailItem As Outlook.MailItem
    Dim ToContact As Outlook.Recipient

    Set OLF = GetObject("", "Outlook.Application").GetNamespace("MAPI").GetDefaultFolder(olFolderInbox)
    Set olMailItem = OLF.Items.Add ' creates a new e-mail message
    With olMailItem
        ' message subject
        .Subject = "This where the subject text goes..."

        ' add a recipient
        Set ToContact = .Recipients.Add("name@org.net")
        ' add another recipient
        Set ToContact = .Recipients.Add("name@org.net")
        ' set latest recipient as CC
        ToContact.Type = olCC
        ' add another recipient
        Set ToContact = .Recipients.Add("name@org.net")
        ' set latest recipient as BCC
        ToContact.Type = olBCC

        ' the message text with a line break
        .Body = "email message"

        ' insert attachment
        .Attachments.Add "C:\FolderName\Filename.txt", olByValue, , "filename goes here"
        ' insert shortcut
        .Attachments.Add "C:\FolderName\Filename.txt", olByReference, , "Shortcut to Attachment"
        ' embedded attachment
        .Attachments.Add "C:\FolderName\Filename.txt", olEmbeddeditem, , "Embedded Attachment"
        ' OLE attachment
        .Attachments.Add "C:\FolderName\Filename.txt", olOLE, , "OLE Attachment"

        .OriginatorDeliveryReportRequested = False ' True would be delivery confirmation
        .ReadReceiptRequested = False ' True would be read confirmation
        '.Save      ' saves the message for later editing
        '.Display   ' displays the email message for editing
        .Send       ' sends the e-mail message (puts it in the Outbox)

    End With

    Set ToContact = Nothing
    Set olMailItem = Nothing
    Set OLF = Nothing

End Sub

Hope the text wrapping doesn’t make it too awkward to read.
As always, if you have any questions do let us know via the comments section.

Edit (18-Dec-2010): Due to a ‘technical’ error this blog entry has changed from it’s original version.  The original explained how to send an email through Outlook using late binding, this post will be re-written and posted again soon.  Apologies for any inconvenience this may cause.

Thursday, 17 June 2010

Playing a sound file using VBA

I recently received a request from a client to add a specific sound when displaying a message box warning.  I knew I’d done this before, and from memory knew it was fairly simple.  So, after ploughing through some old code I came across the code I have put below.  I hope it proves useful to you.

The code uses a call to an API, below.  The API code needs to be copied and pasted to the top of your module code.

' This is required to play a .wav sound with VBA
Public Declare Function sndPlaySound32 _
    Lib "winmm.dll" _
    Alias "sndPlaySoundA" ( _
        ByVal lpszSoundName As String, _
        ByVal uFlags As Long) As Long

Below is the routine which plays the sound, this can be placed in a utilities module and called by various routines, each passing in the name of the sound file you want to be played.

Windows has a folder full of .wav files, they can be found here; C:\Windows\Media.  The routine below allows you to pass in the full file path of a music file, or just the filename.  If you pass in a filename the routine assumes you want to play a Windows default sound and guesses the file path.

Public Sub PlaySound(ByVal SoundFileName As String)
    If Dir(SoundFileName, vbNormal) = "" Then
        ' SoundFileName is not a file. Get the file named by
        ' SoundFileName from the Windows\Media directory.
        SoundFileName = Environ("SystemRoot") & "\Media\" & SoundFileName
        If InStr(1, SoundFileName , ".") = 0 Then
            ' If SoundFileName does not have a .wav extension, add one.
            SoundFileName = SoundFileName & ".wav"
        End If
        If Dir(SoundFileName, vbNormal) = vbNullString Then
            ' Can't find the file. Just use a beep.
            Beep
            Exit Sub
        End If
    Else
        ' SoundFileName is a file, Use it.
    End If
    ' Play the sound, before continuing code
    sndPlaySound32 SoundFileName, 0&
    ' Play sound and continue code.
    sndPlaySound32 SoundFileName, 1&)
End Sub

I have included two lines at the bottom of the code, you can comment out which-ever you choose not to use.  The first plays the sound before allowing the code to continue, the second plays the code and allows the code to continue.  This means you can play a specific sound as you display a message box for example.  Have a play, see which way suits you best.

As always, if you have any questions do let us know via the comments section.

Thursday, 3 June 2010

Do… Loop and For… Next in VBA

Loop statements are used to get Excel to repeat a piece of code a certain number of times. The number of times the code gets repeated can be specified as a fixed number (e.g. do this 10 times), or as a variable (e.g. do this until there are no more rows of data).

The are several ways in which loops can be constructed, depending on the circumstances in which they are going to be used.  Quite often the wanted result can be obtained in different ways, depending on your preferences.

There are two basic kinds of loops, examples of both: Do…Loop and For…Next loops. The code to be repeated is placed between the key words.
ExamplePic1

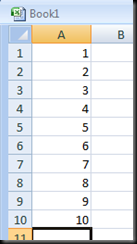
For our first example open a new workbook and place the numbers 1 to 10 in cells A1 through to A10. 

We are going to loop down the list, adding 5 to the number in column ‘A’.

Now open the VBE, add a new module and start a new sub routine call MyLoopStatement.  Copy the code below into your new routine.

Public Sub MyLoopStatement()
    Range("A1").Select 

    Do While IsEmpty(ActiveCell) = False 
        ActiveCell.Offset(0, 1).FormulaR1C1 = "=SUM(RC[-1]+5)" 
        ActiveCell.Offset(1, 0).Select  LoopStatement2
    Loop
End Sub 


This routine loops down the list placing a formula in each of the cells to the right of the  activecell.  It will continue WHILE the active cell is not empty.

The next example uses Do until.

    Range("A1").Select 
    Do
        ActiveCell.Offset(0, 1).FormulaR1C1 = "=SUM(RC[-1]+5)"
        ActiveCell.Offset(1, 0).Select
    Loop Until IsEmpty(ActiveCell)

This example loops until it finds a blank cell.  It is generally considered better practise to use Do Until, rather then Do While.  Both of the above examples runs the code within the loop at least once before testing whether to move on.  You could write the same Do Until / Do While loops in the following way. 

    Range("A1").Select
    Do Until IsEmpty(ActiveCell)
        ActiveCell.Offset(0, 1).FormulaR1C1 = "=SUM(RC[-1]+5)"
        ActiveCell.Offset(1, 0).Select
    Loop

Moving the test to the start of the loop means it is carried out before carrying out any of the instructions within the loop.  This could be useful if, for example, sometimes cells A1:A10 were blank.

if you know or can use VBA to find out how many times you want to repeat the code you can use a For… Next loop.

In the following example we know that we have 10 rows of data, so we can tell the code to loop 10 times.

    Dim l As Long
    Dim lRowCount As Long

    lRowCount = Range("A1").CurrentRegion.Rows.Count - 1
    ' You could also try
    ' lRowCount = Cells.SpecialCells(xlCellTypeLastCell).Row

    For l = 1 To lRowCount
        ActiveCell.Offset(0, 1).FormulaR1C1 = "=SUM(RC[-1]+5)"
        ActiveCell.Offset(1, 0).Select
    Next l

For… Next loops are particularly good a looping through objects.

    Dim wb As Workbook
    Dim ws As Worksheet

    Set wb = ThisWorkbook

    For Each ws In wb.Worksheets
        Debug.Print ws.Name
    Next ws

The above code would be quicker then:

    Dim l As Long
    Dim wb As Workbook

    Set wb = ThisWorkbook

    For l = 1 To wb.Worksheets.Count
        Debug.Print wb.Worksheets(l).Name
    Next l

As always, I hope the above examples have been helpful.  If you have any questions or comments please do let us know.

Saturday, 29 May 2010

Working with Collections

By using Collections within VBA you can store multiple objects, similar to an array.  The key advantage with Collections is that the objects can be added, removed and used by referring to the objects ‘Key’, rather then having to loop through an array.

In this blog post I am going to use the example code provided in my previous blog post Working with Class Modules.

Within the class module cls_Employee we have the following properties, Name, Department, Age and Salary.  In this blog post I will run though how to create multiple employee class objects and add them to a collection.  We will then loop through the collection and retrieve and remove an employee.

To store multiple instances of a class, in this example a group of employees, create several instances of the class and load them to a collection as follows.

    Dim clsEmp As cls_Employee
    Dim colEmp As Collection

    Set colEmp = New Collection

    ' Loop through your existing list
    For Each Item In SomeList

        ' Create a new instance of the employee class
        clsEmp = New cls_Employee

        ' Set the properties of the class
        ' As per the example in the previous blog post

        'Load the class to the collection, _
         using the employee's name as the 'key'

        colEmp.Add clsEmp, clsEmp.Name

    Next Item

Now, you can use a simple For Each loop to loop through the collection and iterate through the collection and access each instance of cls_Employee sequentially:

    Dim clsEmp As cls_Employee
    ' Loop through a collection to retrieve each item
    For Each clsEmp In colEmp
        Debug.Print clsEmp.Name
        Debug.Print clsEmp.Dept
        Debug.Print clsEmp.Age
        Debug.Print clsEmp.Salary
    Next clsEmp

To retrieve or remove a specific employee you can use the object’s ‘key’ to refer to it.

    ' Use the key to retrieve a specific employee
    Dim clsEmp As cls_Employee
    clsEmp = colEmp("Fred Smith")

    ' Use the key to remove a specific employee
    Dim clsEmp As cls_Employee
    colEmp.Remove "Fred Smith"

Something worth noting is that the key needs to be a text value.  Other values can be used but may require the Str() function wrapped around them.

Friday, 28 May 2010

Working with Class Modules

I’d been working with Excel and VBA for more then 6 years before I caught on to just how useful class modules can be.  Class modules can be a powerful tool used within intermediate to advanced level VBA programming.  Below is something I hope you will find a useful introduction to how to use them.

This example does assume some basic knowledge of the VBE (Visual Basic Editor).

We’ll start where almost all examples for class modules start; with an employee, the employee is called Fred Smith (original, I know), works in accounts, is 25 and earns £22k.

To start, add a new class module to your VBA project.  For this example change the name from Class1 to cls_Employee.  Do this by editing the (Name) item in the ‘Properties’ list for the class module.

You then need to create the variables which are going to be used within the class module, since they are declared Private, they are not available outside of the class module.

Option Explicit

Private strName As String
Private strDept As String
Private lngAge As Long
Private dblSalary As Double

Now we need to add the property procedures which allow us to write to and read from the above variables.  To do this we need Property Get and Property Let functions.  (Property Set is used for objects).

' Name property
Public Property Get Name() As String
    Name = strName
End Property
Public Property Let Name(value As String)
    strName = value
End Property

' Department property
Public Property Get Dept() As String
    Dept = strDept
End Property
Public Property Let Dept(value As String)
    strDept = value
End Property

' Age property
Public Property Get Age() As Long
    Age = lngAge
End Property
Public Property Let Age(value As Long)
    lngAge = value
End Property

' Salary property
Public Property Get Salary() As String
    Salary = dblSalary
End Property
Public Property Let Salary(value As String)
    dblSalary = value
End Property

The Let procedure is used to assign values to the class. The get procedure is used to get the values from the class.  Please note that the data types must be the same for the ‘value’ be passed through and the Get procedure.

A property can be made read-only simply by omitting the Let procedure. For example, a read-only property might be tax, which is calculated when it is called. E.g.,

'Tax property
Public Property Get Tax() As Double
    Tax = Calculate value
End Property

Class modules can also contain sub routines and functions, such as the PrintEmployeeData below.

' Print employee data routine
Public Sub PrintEmployeeData()
    ' You code appears here
End Sub

Now that we have the class module ready we can create objects based on the class module.  Add a standard code module to your project.  Within a new sub routine declare a new variable as type cls_Employee like the example below.

Option Explicit

Sub AddEmployee()
    Dim clsEmp As cls_Employee

End Sub

ClsEmp has to be set as a new instance of the the class before we can assign values to it’s properties, like below.

    Set clsEmp = New cls_Employee
    clsEmp.Name = "Fred Smith"
    clsEmp.Dept = "Accounts"
    clsEmp.Age = 22 
    clsEmp.Salary = 25000

You can retrieve the data value from the class using code similar to the below example.

    MsgBox "Employee Name: " & clsEmp.Name;

I hope this has helped with your understanding of class modules within VBA.  The above example code will work in Excel and Access.

I would like to add that this blog post and code examples, although my own, is based a on the article from which I learned about class modules.  That article can be found at Chip Pearson’s website: http://www.cpearson.com/

In my next blog post I will cover how to store multiple objects (employees) in a collection.

Tuesday, 9 March 2010

Transpose an array

If you have ever used the paste special transpose option within an Excel worksheet you will know how handy it is.  The transpose option allows you copy a list, for example 10 rows with 2 columns, and turn it sideways, leaving you with 2 rows and 10 columns.

TransposeArray1 

Well below is a simple function you can copy straight into any VBA module.  It allows you to pass in an array of any size and passes back the ‘transposed’ array results.

Public Function TransposeArray(v As Variant) As Variant
' Custom Function to Transpose a 0-based array (v)

    Dim x As Long, y As Long, Xupper As Long, Yupper As Long
    Dim tempArray As Variant

    Xupper = UBound(v, 2)   'rows
    Yupper = UBound(v, 1)   'columns

    ReDim tempArray(Xupper, Yupper)
    For x = 0 To Xupper
        For y = 0 To Yupper
            tempArray(x, y) = v(y, x)
        Next y
    Next x

    TransposeArray = tempArray

End Function

I hope it proves useful.  If you have any questions or ideas for future blog posts please let us know via the comments section.

I’d like to add a thank you to a possible future Zypher-Blog colleague Niall for the example code.

Sunday, 21 February 2010

Current User and Current PC

In this post I thought I'd show two very useful functions which use Windows API calls, the username and PC name functions.  Windows API calls allow you to get information or features from the operating system which Excel and Access do not have.
The first step in using an API call is to tell VBA the function exists, where to find it, what arguments it takes and what data type it returns. This is done using the Declare statement, such as the example below.

Private Declare Function GetUserNameA _
  Lib "advapi32.dll" _
  (ByVal lpBuffer As String, nSize As Long) As Long

This statement tells the VBA interpreter that there is a function called GetUserNameA located in the file advapi32.dll that takes two arguments, the first a string and the second a Long value and returns a Long value. Once defined, we can call GetUserNameA in exactly the same way as if it is the VBA function:

  lng = GetUserNameA(strUserName, intLength)

The Function below uses the GetUserNameA API function and turns the results into a string which shows the current users Windows login.

Public Function CurrentUser() As String
'-- used to get current user's login id --
    Dim strUserName As String
    Dim lngLength As Long
    Dim lngResult As Long
    ' Set up the buffer
    strUserName = VBA.String(255, 0) 
    lngLength = 255
    ' Make the call 
    lngResult = GetUserNameA(strUserName,  lngLength)
    ' Assign the value
    CurrentUser = Left(strUserName, _
        InStr(1, strUserName, VBA.Chr(0)) - 1)
End Function

You can add this this code to any normal VBA module within either Excel or Access.  The API ‘Private Declare Function’ should be placed at the top of the module, before any other Sub Routines or Functions.
The current PC function, below, works in much the same way.

Private Declare Function GetComputerNameA Lib "kernel32" _
    (ByVal lpBuffer As String, nSize As Long) As Long

Public Function CurrentPC() As String
'-- used to get current user's login id --
    Dim strPCName As String
    Dim lngLength As Long
    Dim lngResult As Long
    ' Set up the buffer
    strPCName = VBA.String(255, 0)
    lngLength = 255
    ' Make the call
    lngResult = GetComputerNameA(strPCName, lngLength)
    ' Assign the value
    CurrentPC = Left(strPCName, _
        InStr(1, strPCName, VBA.Chr(0)) - 1)
End Function

Google / Yahoo as always will be able to provide more information on using API calls, this site is also probably worth a read.
I’ll add a sorry about the colour scheme, guess that’s what happens when you choose black as a background.